I appreciate on first inspection this looks a lot like a wooden bird box which falls pretty short of being classed as ‘high tech’. But this has to actually be one of the coolest things I’ve been given.
Complementing the spacious and robust wooden bird box is a 1080p HD wireless night vision camera, and an auto sensing daylight LED lamp.
And the whole lot works beautifully with my existing home network setup!
It’s a kit from Green Feathers – the ‘Complete Deluxe Wifi Bird Box Camera Kit‘ and you get everything you need. Mine includes the additional daylight LED to help the camera not drop into night vision mode during the day.
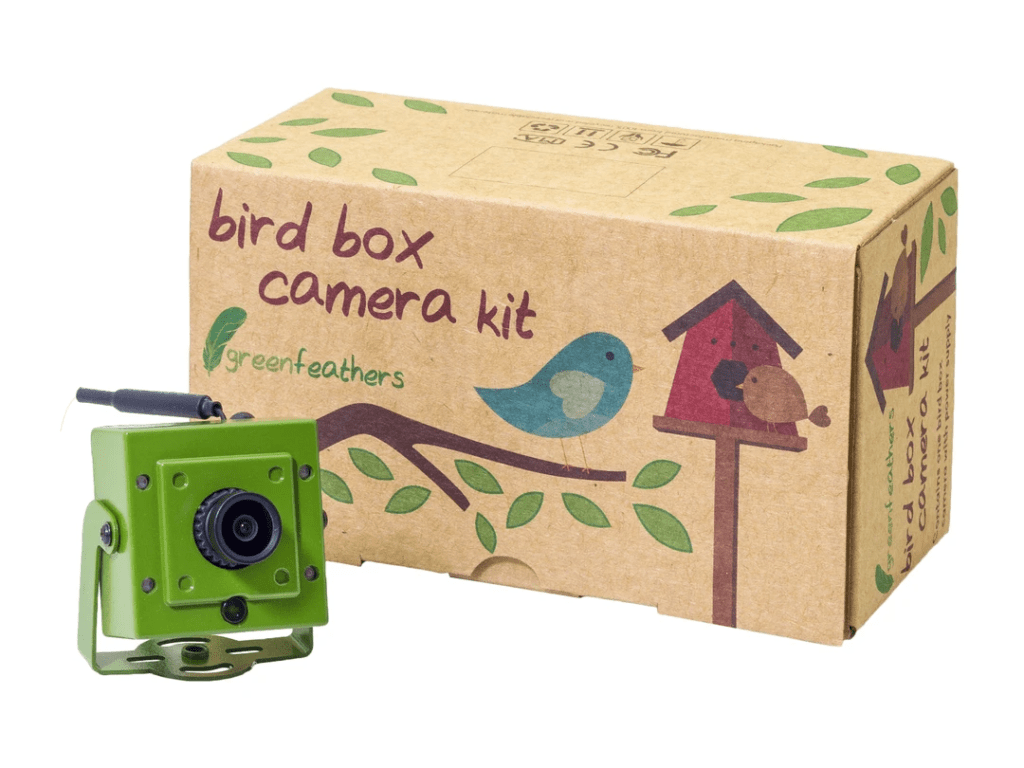
The camera is pretty impressive, in a robust metal chassis (which they point out isn’t waterproof) with a small external wifi antenna produces a very sharp and crisp 1080p HD picture.
Bird Box Camera Specs
- Imaging Chip: 1/3″ CMOS
- Pixels: 1920×1080 (2 megapixels)
- Light Sensitivity: 0.5 Lux (IR Off), 0 Lux (IR On)
- Stream Frame Rates: 1920×1080 @ 25fps with H.264 video compression
- Lens: 2.8mm F/1.4
- Field of View: 103°
- Audio Input: Built-in Mic
- Day & Night: Auto ICR
- LEDs: 4x high efficiency 940nm
Wifi: 2.4Ghz only (thankfully my unifi network is 2.4ghz and 5ghz)
The camera is mains powered, and a splitter in the wiring loop means you run one cable powers both the daylight sensing LED and the camera, and you get a decent 10m extension cord. Initial setup of the camera is via an app – their own Green Feathers app was android only at the time I got mine, but it can also be configured TuyaSmart. However I only really needed to use this to configure the camera to connect to my wifi network.
Here’s a couple of test snapshot images taken from the bird box camera (obviously no one has moved in yet).
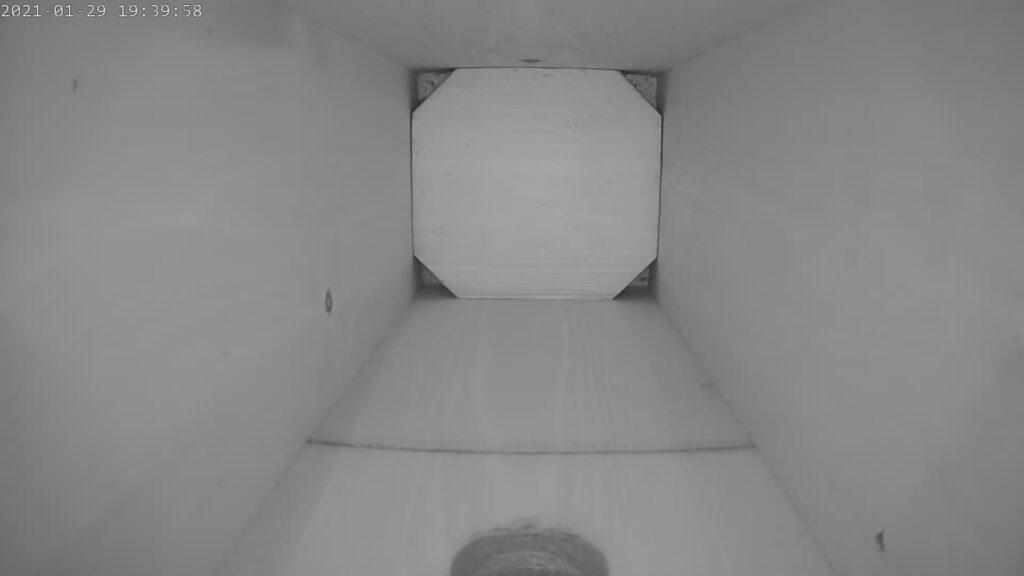
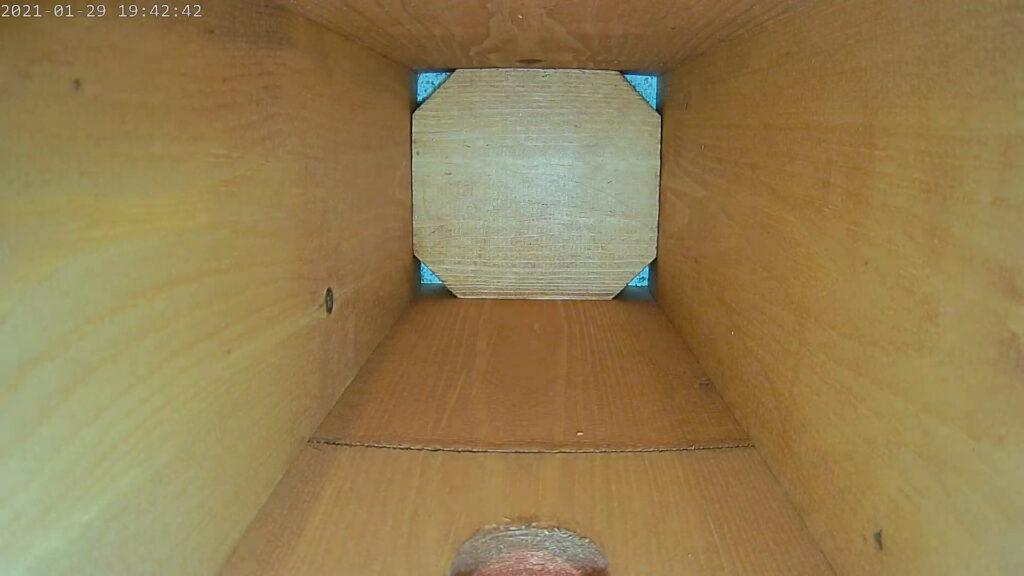
You can view a live feed from the camera in the app and there appears to be a micro SD slot for storing recordings. But once some little birdies take up residence in the box it’s against the law to disturb them, so I’m not sure how accessible that feature would be.
Integrating with my home network
However, my home network has a Synology Network Attached Storage (NAS) tucked away on it, and that comes with a feature I’ve not been using yet that works brilliantly with this camera.
There’s a package on the NAS called ‘Surveillance Station‘ which is designed to work with a small to medium CCTV setup. You get a license to add 2 cameras for free with the NAS and I’ve not been using it before. As well as allow you to monitor multiple cameras it does clever things like motion sensing recording and alerts you via email if movement is detected.
Adding a Camera to Surveillance Station
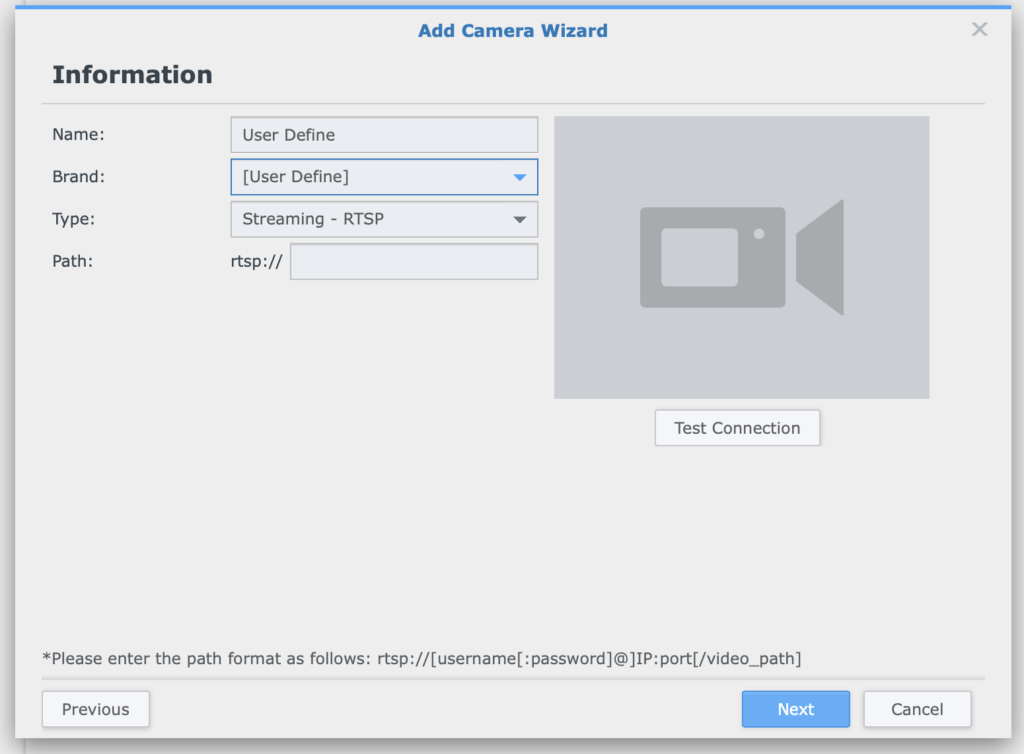
Once Surveillance Station is installed on your NAS, you simply need to launch the app, Select the IP Camera icon, and add the details of your bird box camera.
Just press ‘Add Camera’ to launch the wizard, and pick ‘Quick Setup’
- Give your camera a name (like ‘Bird Box’)
- Skip down to ‘Brand’ and select [User Define]
- For ‘Type’ leave it set to RTSP
- and for Path add the streaming URL for your camera. This will be something like:
rtsp://192.168.1.xxx:554/stream0
Where the IP address is the IP of your camera. There is no username/password combination to add – just the IP address and port ‘554’, along with the video path of ‘/stream0’.
(worth noting at this stage that you’ll likely want to give your camera a fixed IP address rather than let your router assign it dynamically. If it ever changes because of a power outage or a router reboot you’ll need to change this configuration).
Setup was easy – I just had to manually add the streaming URL of the camera (after giving the camera a fixed IP address) and the Synology NAS was able to see it.
I made a slight adjustment to recording preferences based on motion event detection to capture more time before movement is noticed. I now have a setup where I’ll never miss any action on the camera – it will all be recorded!
The other thing you’ll want to do here is make sure your NAS can send email notifications. I had this setup already as part of my ‘Disk Station Manager’ config and I simply turned these on for Surveillance Station. This means I get an email with a screen shot from the live feed showing me what was detected.
Watching the Bird Box Live Feed on the Living Room TV
And I can also watch the bird box camera stream nativly on my tele! Adding the CCTV Viewer app to my Apple TV (which was just £2.99 at time of writing) I could manually configure the streaming URL for the camera. This gets me the live feed. And if I want to catch any of the recorded action I can do this on my laptop or via the Synology DS Cam app on my phone.
So now whenever I want to see what’s going on live in the bird box (which at the moment is not a lot) I can just pop it on the tele…and I’ll never miss a moment because any motion will trigger a recording and an email alert.
So like I said at the beginning, a pretty high tech birthday present. Just patiently waiting for some little birdies to move in now and make it their home after I fix it to the wall.
Maybe I’ll turn it into a YouTube Live, or Twitch stream next 😉 But I promise to update this post if anything exciting happens.